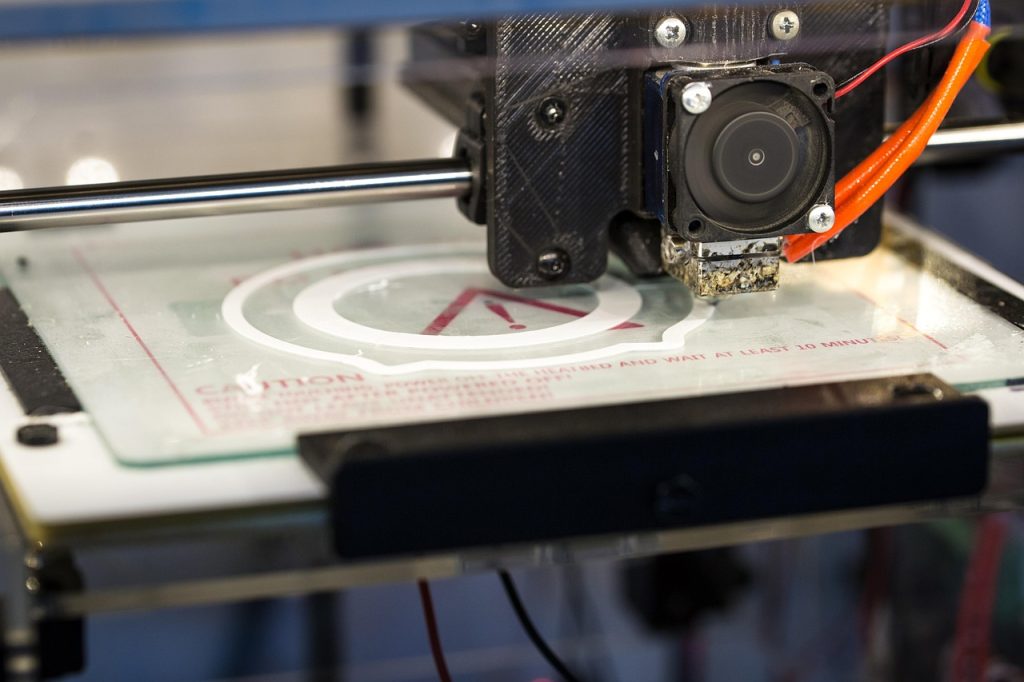
PPフィラメントを用いた3Dプリントは、収縮、表面密着性、および部品の形状を適切に制御できれば実用化が可能になります。ポリプロピレン(PP)は、世界で最も広く使用されている熱可塑性プラスチックの一つであり、年間生産量は約7,500万メートルトンに上りますが、FDM方式の3Dプリントにおいては、意外にもその利用が限定的です。 このギャップが存在するのは、PPが積層造形に適さない材料だからではなく、これまで印刷を困難にしてきた特有の加工上の課題があるためです。しかし、これらの課題は現在では十分に解明されており、適切な機器と設定を用いれば対処可能です。.
PPが取り組む価値がある理由は、その独自の特性の組み合わせにあります。すなわち、酸、塩基、溶剤に対して優れた耐薬品性を備え、 汎用FDMフィラメントの中で最高の耐疲労性を備えており、リビングヒンジに実用的に使用できる唯一の素材であること;3Dプリント用ポリマーの中で最も低い密度(約0.90 g/cm³)であること;そして、$30-60/kgという材料コストにより、試作や少量生産を経済的に実現できることです。 このガイドでは、PPのプリントを成功させるために知っておくべきこと、およびPPが適切な材料選択となるケースを理解するために必要な情報を網羅しています。.
PPが、これまでに印刷した他のどのフィラメントとも異なる挙動を示す理由
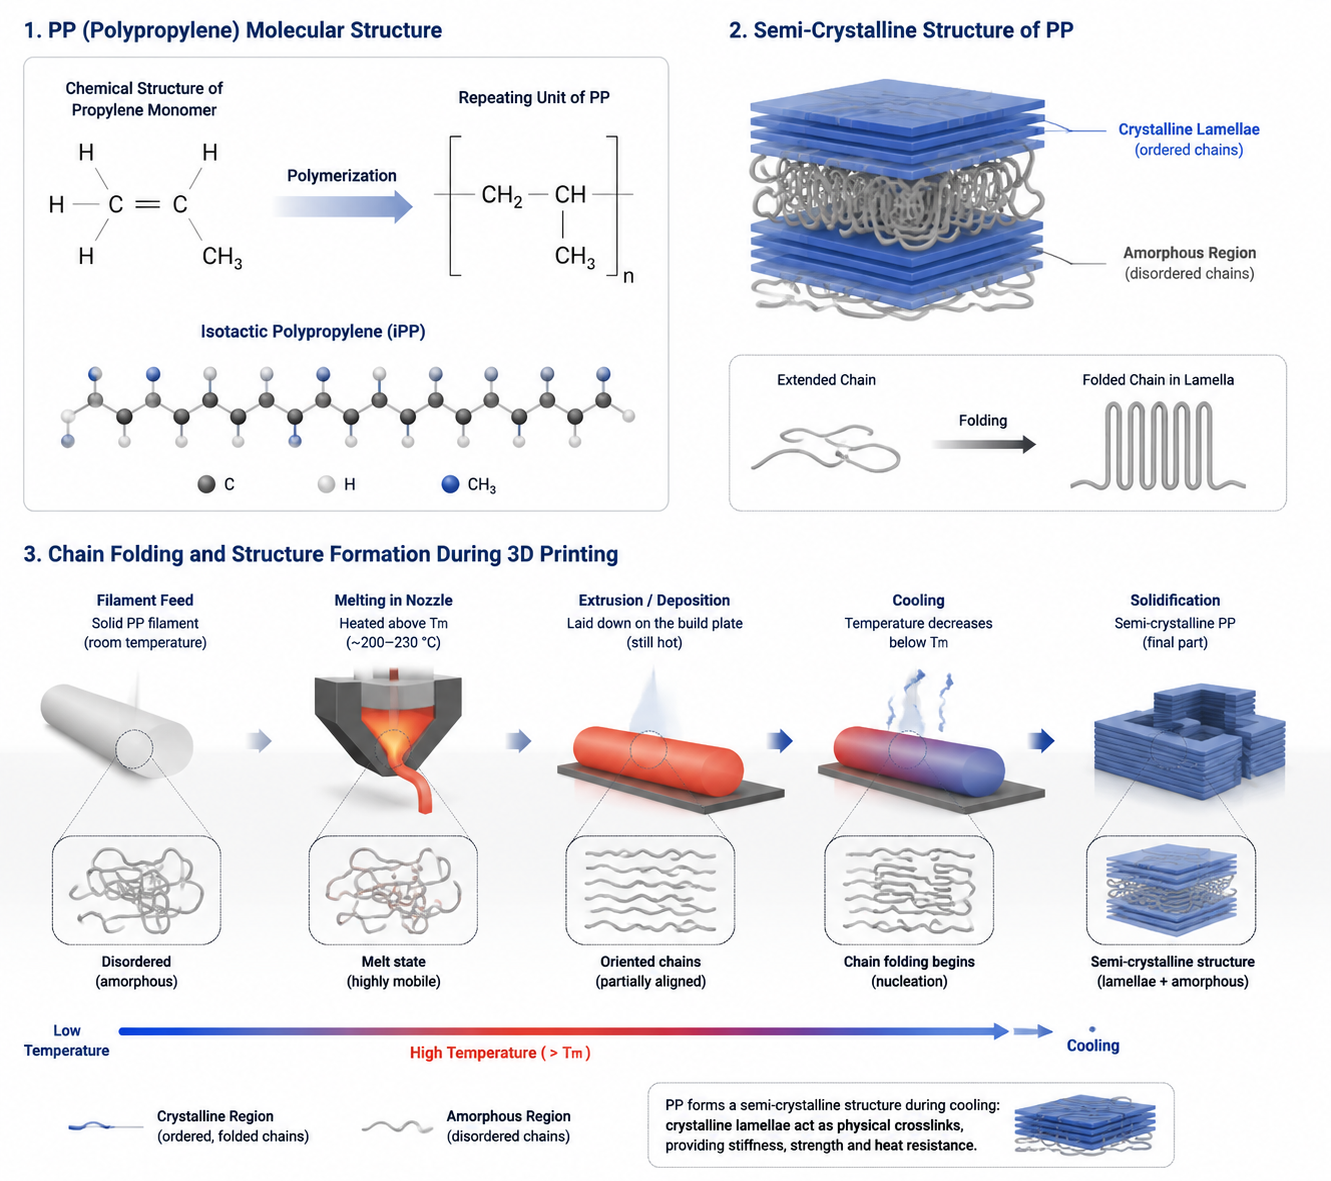
ポリプロピレンは半結晶性ポリオレフィンであり、その分子構造(メチル側鎖を持つ単純な炭化水素骨格)により、FDM印刷で主流となっているPLA、PETG、ABSとは根本的に異なる特性を有しています。 造形において最も重要な違いは、PPの表面エネルギーが極めて低いこと(通常29~31 mN/m)です。比較として、PLAは約38 mN/m、PETGは約36 mN/m、ABSは約35 mN/mです。.
この低い表面エネルギーのため、PPはどのようなものにも付着しにくい性質を持っています。ビルドプレートにも、層間のPP同士にも、そしてほとんどの接着剤やコーティング剤にも付着しません。PPを化学薬品容器に最適な素材にしているこの特性(内部に何も付着しない)こそが、層ごとの積層において、PPを扱いにくい素材にしているのです。 この低い表面エネルギーを克服することが、PPプリントにおける最大の課題であり、PPプリントを成功させるためのあらゆるワークフローは、表面処理、温度制御、および接着戦略を中核として構築されています。.
2つ目の重要な違いは、PPの収縮挙動です。 半結晶性ポリマーであるPPは、結晶化の過程で著しい体積収縮を起こします。通常、X-Y面では1.5~2.5%、Z方向では最大3%の収縮が見られます。これはABSの収縮率の約2倍であり、PLAの10倍以上に相当します。 収縮を適切に制御しないと、反りが生じ、印刷の途中でパーツがビルドプレートから完全に浮き上がってしまう可能性があります。この問題の解決策は、高いベッド温度(80~110°C)、エンクロージャーの加熱、および適切なベッド接着材を組み合わせることです。熱応力に関するより広範なトラブルシューティングの枠組みについては、当社の 3Dプリントの反り対策ガイド 便利な相棒です。.
PP用のプリンター要件:必要なもの
| 要件 | 価値 | なぜ重要なのか |
|---|---|---|
| ノズル温度 | 220~250°C | 標準的なホットエンドの対応範囲内。全金属製が望ましいが、必須ではない。 |
| ベッド温度 | 80~110°C | 結晶化速度を制御します。低すぎると、極端な反りが生じます。 |
| 添付資料 | 強くお勧めします | 周囲温度が35~40°Cであっても、屋外に比べて反りが劇的に減少します |
| ベッドの表面 | PP製品:PPテープ、PPシート、または梱包用テープ | 鉄則――PPはPPに密着する。標準的な表面では完全に失敗する |
| ノズルの材質 | 標準の真鍮でOK | PPは非研磨性であるため、特別なノズルは必要ありません |
PPプリントにおいて最も重要な装備は、ビルド面です。PPは表面エネルギーが低いため、PEIシート、BuildTak、スティックのりを塗ったガラス、ペインターテープといった標準的なプリント面では、PPを確実に固定することができません。 フィラメントは最初の数層のうちにプリントベッドから剥がれてしまったり、収縮応力の影響でプリントの途中でパーツ全体がプリントベッドから外れてしまったりします。.
その解決策は実にシンプルです。PPはPPに密着するのです。ポリプロピレンのシート――市販のPPプリント用フィルム、サイズに合わせてカットしたPPシート、あるいはビルドプレートに貼った透明なポリプロピレン製の梱包用テープなど――は、押し出されたPPが融合する化学的に同一の表面を提供します。 この「同質」な接着特性のため、パーツを取り外す際には注意が必要です。薄いPPシートは、数回のプリント後に交換が必要になる場合があります。PPベースのスティックのりや、特別に配合されたPP用接着促進剤で成功したとの報告もありますが、物理的なPP表面を用いるのが最も信頼性の高い方法です。.
効果的な印刷設定:温度、速度、冷却
ノズル温度:予想以上に高い
PPの印刷温度は220~250°Cですが、層間接着に最適な温度は通常、この範囲の上限である240~250°Cです。 温度が低いと、押し出されたビードが前の層の表面を十分に再溶融できず、層間接着性が著しく低下します。220°CでプリントされたPP製部品は、わずかな機械的応力でも剥離することがよくあります。245~250°Cでは、層間接着性が大幅に向上し、機能部品に必要な強度に近づきます。.
実用的な校正方法:220°Cと250°Cで2本の小さな引張試験片をプリントし、それぞれを手で折ってみてください。220°Cの試験片は、おそらく層の境界線に沿ってきれいに分離するでしょう。 一方、250°Cのバーは分離しにくく、層の間ではなく層を横切って破断する可能性があります。この違いは、他の一般的なフィラメントよりもPPでより顕著に現れます。これは、PPの表面エネルギーが低いためです。つまり、層界面を跨いで強い分子間結合を形成しようとする材料本来の抵抗を、温度によって克服しなければならないからです。.
ベッド温度と最初のレイヤー:成否を分ける重要な要素
PPの場合、ベッド温度には「密着性」と「結晶化制御」という2つの目的があります。密着性に関しては、ベッド温度を80~100°Cに保つことで、PP表面をその軟化点以上に維持し、押し出された第1層とPPの造形面との間で分子間の相互拡散を可能にします。80°C未満では、造形面が硬すぎて効果的な接着が得られません。.
結晶化を制御するには、印刷中ずっとビルドプレートを80~100°Cに保つことで、下層の冷却速度を遅らせ、ポリマー鎖が応力のかかった非晶質状態で固まるのではなく、制御された状態で結晶化する時間を確保します。低温のベッドで印刷された部品は(<60°C)では、下層が非晶質のままである一方、上層が結晶化して収縮するタイミングが異なるため、極端なカールが生じる。.
1層目の設定は極めて重要です。1層目は、通常のノズル温度より5~10°C高く設定し、通常の印刷速度の50~60%、押出幅を110~120%にして印刷してください。 これらの設定により、重要なベッド密着層の接触面積と熱照射が最大化されます。PPの場合は、幅5~10mmのブリムを設定することを推奨します。これは、パーツにラフトサポートが必要なからではなく、ブリムによって総密着面積が増加し、反りが発生しやすいパーツの端部における応力集中を軽減できるためです。.
印刷速度と冷却
PPは適度な速度で印刷する必要があります。ほとんどの形状では、30~50mm/sが目安です。速度を遅くすると、押し出されたフィラメントが前の層に熱を伝達する時間が長くなります。60mm/sを超えると、ノズルの温度に関係なく、層間の密着性が確実に低下します。.
PPの冷却戦略は、PLAやPETGと比較すると直感に反するものです。PPは冷却によって結晶化しますが、急激な冷却を行うと、応力がかかり、部分的に非晶質の構造が形成されます。部品の冷却ファンは、最初の3~5層の間はオフにし、残りの層については最大20~40%で稼働させる必要があります。 冷却が強すぎると、結晶化が適切に進む前にビードが固まってしまいます。逆に冷却が弱すぎると、オージングが過度になり、オーバーハングの成形性能が低下します。周囲温度を35~50°Cに維持するエンクロージャーを使用することで、部品と環境間の温度勾配を低減し、成形結果を劇的に改善することができます。.
材料特性:PPがもたらすメリット
| プロパティ | PP(FDM印刷) | PLA | ABS | PETG |
|---|---|---|---|---|
| 密度 | 0.90 g/cm³ | 1.24 | 1.04 | 1.27 |
| 引張強度 | 25~35 MPa | 50-60 | 35-45 | 50-55 |
| 破断伸度 | 100-600% | 5-10% | 10-25% | 15-25% |
| 曲げ疲労 | 素晴らしい | 貧しい | フェア | グッド |
| 耐薬品性 | 素晴らしい | 貧しい | 貧弱(溶媒) | グッド |
| ガラス転移温度(Tg) | ~0°C | 約60°C | 約105°C | 約80°C |
| 熱変形温度(HDT) | 50~60°C(充填なし) | 約55°C | 約95°C | 約70°C |
| コスト/kg | $30-60 | $20-30 | $20-35 | $25-40 |
この特性プロファイルを見ると、PPが特定のニッチ市場を占めている理由がわかります。つまり、PPは高い剛性や耐熱性が求められる用途向けの材料ではないのです。 PPの引張強度は25~35 MPaと控えめであり、熱変形温度は約55°Cであるため、熱湯中で軟化してしまいます。しかし、耐薬品性に加え、柔軟性、そして数千回の曲げサイクルに耐える耐久性が求められる用途においては、FDMフィラメントの中でPPに勝るものはありません。.
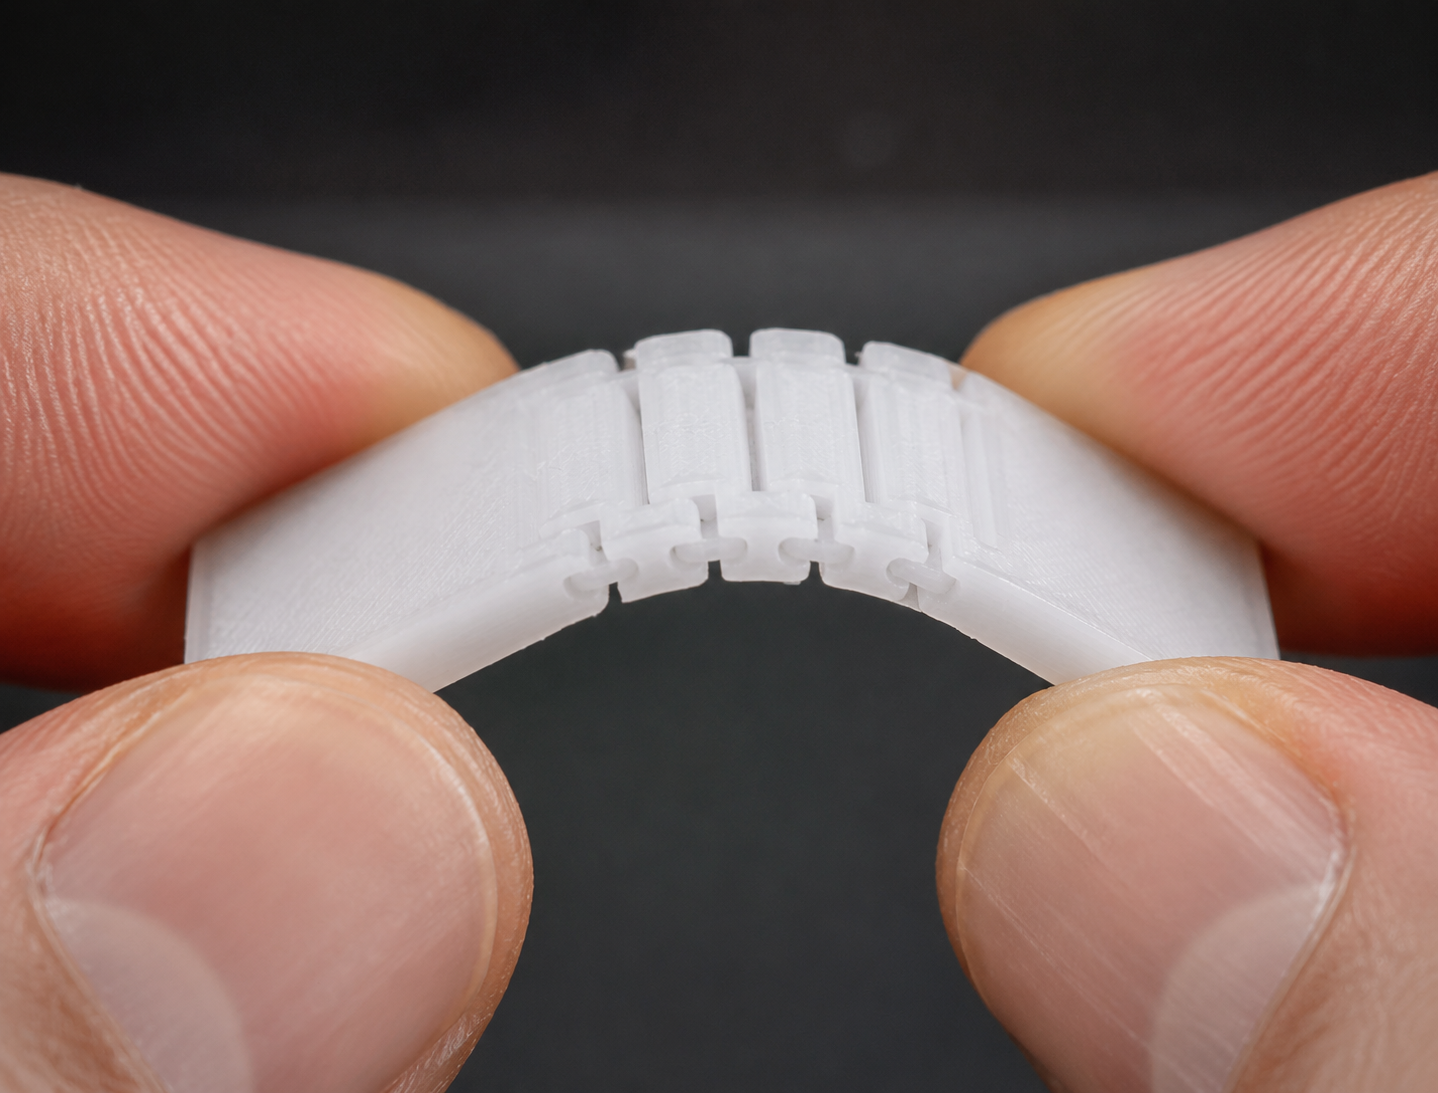
リビングヒンジは、PPの代表的な用途です。なぜなら、他のFDM材料にはできないPPの特性を完璧に体現しているからです。つまり、破損することなく、繰り返し――多くの場合、数百万サイクルにも及ぶ――曲げに耐えることができるのです。PLAはすぐに折れてしまいます。PETGは数十サイクルの曲げに耐えた後にひびが入ります。ABSは数百サイクルに耐えます。 半結晶構造における塑性変形の分子メカニズムのおかげで、PPだけが数万回から数百万回もの曲げサイクルに耐えることができます。.
業界横断的な主な用途
リビングヒンジとフレキシブル機構
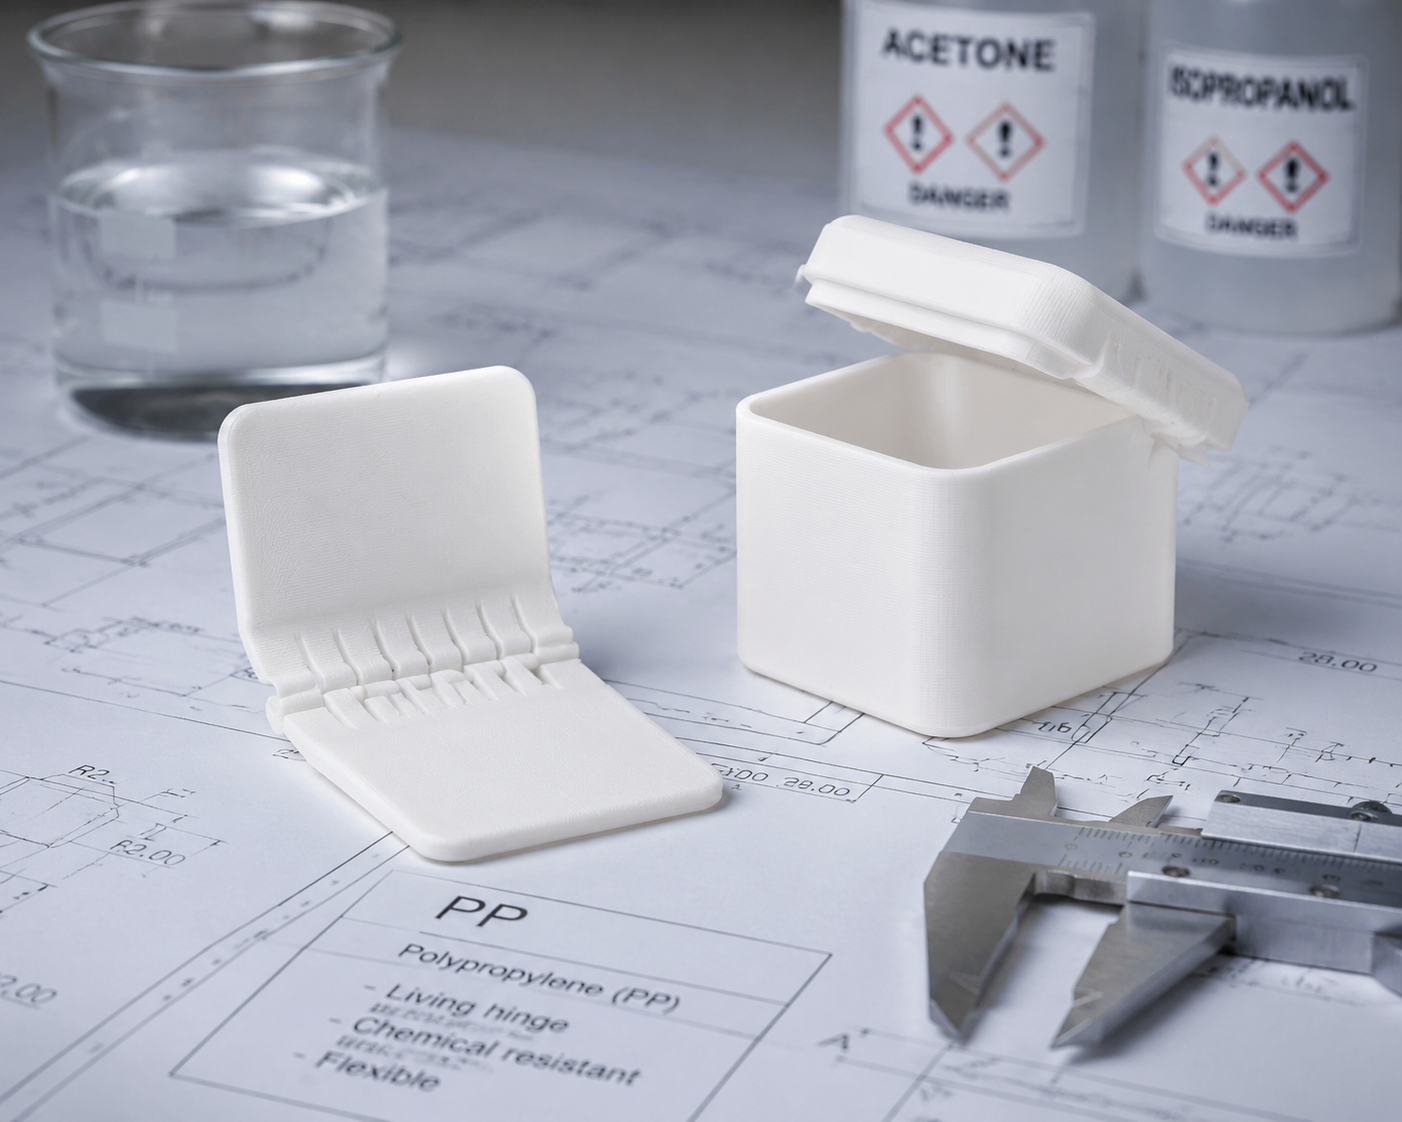
リビングヒンジとは、材料の薄い部分であり、これが曲がることで、部品の2つの剛性のある部分が互いに相対的に回転できるようになるものです。射出成形において、リビングヒンジはPP製の容器、キャップ、およびクロージャーの標準的な設計要素です。 3Dプリントにおいて、リビングヒンジを適切に形成できるFDM材料はPPのみであり、プリントの向きが極めて重要となります。ヒンジは、曲げによる剥離時に層間境界に負荷がかからないよう、ヒンジ軸がY軸と平行(または積層面に対して垂直)になるようにプリントする必要があります。 厚さ0.3~0.5mmのPP製リビングヒンジを、適切な向きで245°Cでプリントし、冷却を最小限に抑えれば、数千回の開閉サイクルに耐えることができます。.
化学物質および流体の取り扱い
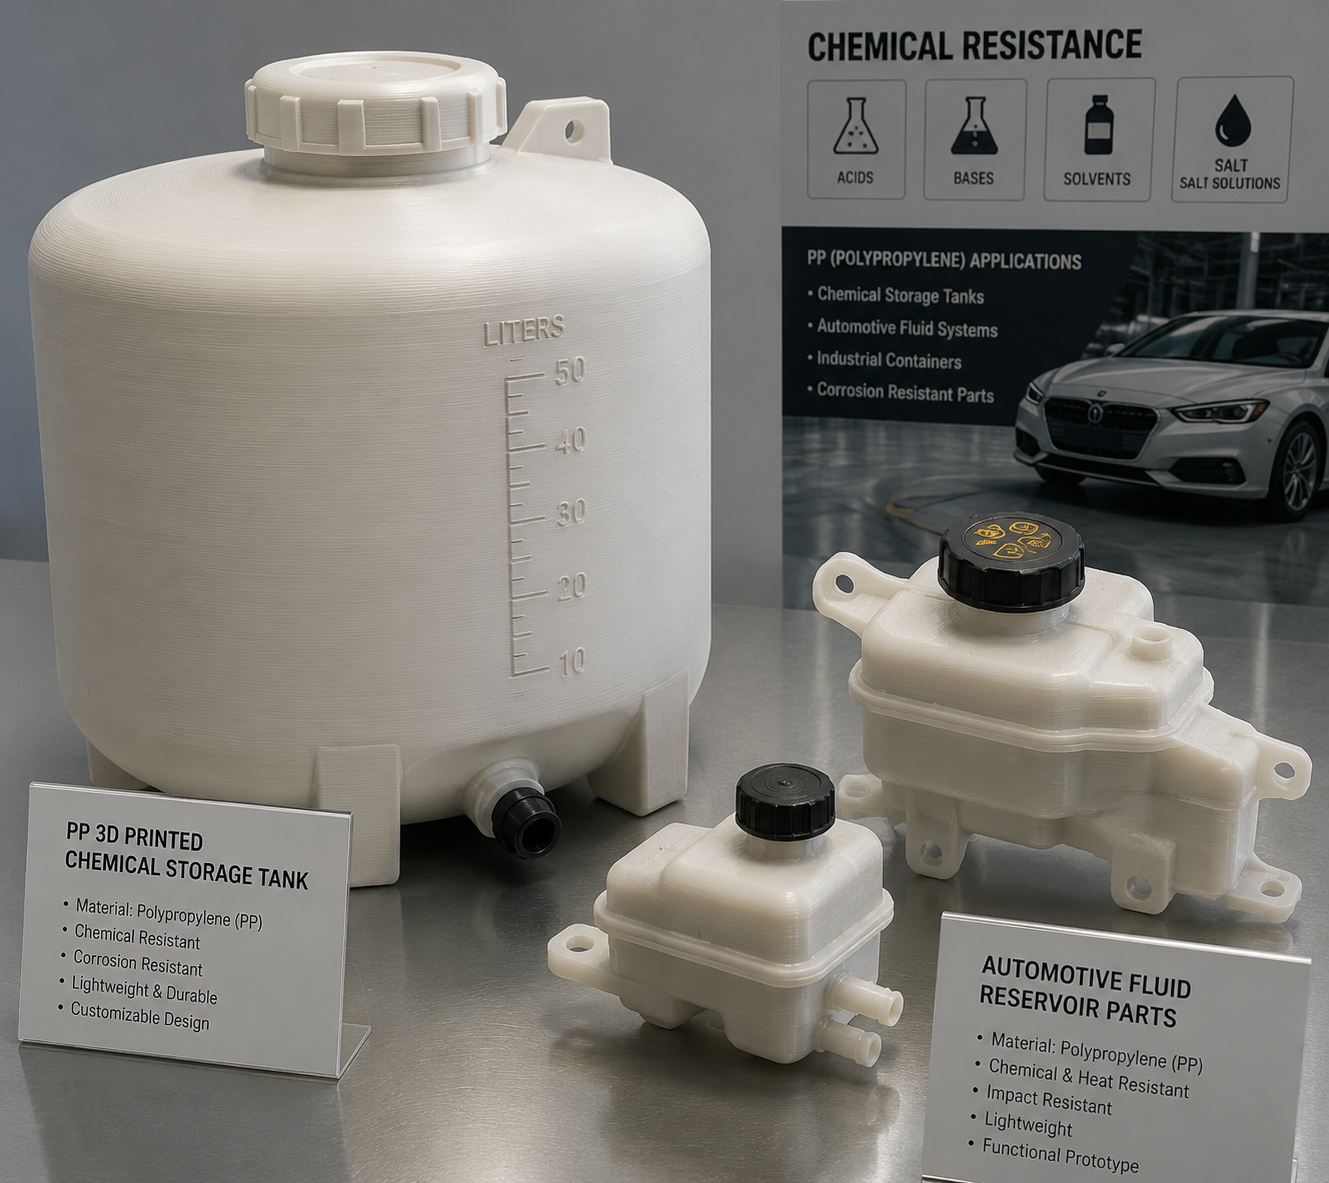
PPは、室温においてほとんどの酸、塩基、アルコール、および有機溶剤に対して耐性を示します。この素材は、特注の流体貯蔵タンク、薬液注入システムの部品、実験用器具、および腐食性の強い化学物質と接触するあらゆる試作品に最適な素材です。 多くの一般的な溶剤で溶解したりひび割れが生じたりするABSや、弱酸溶液でも加水分解してしまうPLAとは異なり、PPは、他のプリント部品を数分で破壊してしまうような化学物質への曝露にも耐えることができます。.
ただし、PPには化学的な弱点もあります。強力な酸化性酸(濃硝酸、濃クロム酸)や一部の塩素系溶剤は、PPを侵食します。80°Cを超える高温下では、多くの有機溶剤によってPPが膨潤します。実験室や産業現場における室温での化学物質取り扱い用途の大部分においては、PPは化学的に十分な耐性を備えています。.
軽量構造部材
PPの密度は0.90 g/cm³であり、同じ部品の体積において、PLAよりも約27%、PETGよりも29%軽量です。重量が重要な用途(ドローン、ロボットのエンドエフェクタ、携帯型機器など)では、この密度の優位性が大きな意味を持ちます。 ガラス繊維を充填したPP(GF-PPフィラメント、通常は20~30%のガラス繊維)は、密度の利点の大部分を維持しつつ、引張強度を40~55 MPa、剛性を3~5 GPaまで向上させます。GF-PPは、ガラス繊維の摩耗性が高いため、硬化ノズルが必要です。.
自動車のボンネット内部品
PPはすでに、自動車の内装やエンジンルーム内の用途において主流のポリマーとなっています。バッテリーケース、液タンク、吸気系部品、トリムパネルなどは、その圧倒的多数がPPの射出成形品です。 3Dプリント用PPを使用すれば、これらの部品を実際の生産用材料で迅速に試作することができます。これは非常に重要な点です。なぜなら、ABSやPLAで作られた試作品では、最終的なPP部品のスナップフィット特性、耐薬品性、あるいは長期的なクリープ性能を再現できないからです。.
消費者向け製品のプロトタイプ
PPは、消費財の包装、家電製品、玩具、家庭用品などで広く使用されています。これらの製品のプロトタイプをPLAや樹脂ではなくPPで作ることで、量産品の質感、柔軟性、耐久性に非常に近いものを実現できます。 PPの柔らかく、わずかにワックスのような表面の質感は、PLAの硬く、もろい感触とは明らかに異なり、この触感の違いは、消費者向け製品の評価においてしばしば重要な要素となります。.
高度なPP印刷:充填グレードおよび特殊フィラメント
ガラス繊維強化ポリプロピレン(GF-PP)
PPに20-30%ガラス繊維を添加すると、その機械的特性が変化する。引張強度は25~35 MPaから40~55 MPaに増加する。曲げ弾性率は1.0~1.5 GPaから3.0~5.0 GPaに増加する。 熱変形温度は55°Cから90~110°Cに上昇します。収縮率は1.5~2.5%から0.3~0.8%に低下するため、GF-PPは充填剤を含まないPPに比べて、反りなく印刷することが格段に容易になります。 その代償として、脆性の増加(伸び率が数百パーセントから3~5%に低下)、ノズルの摩耗(硬化鋼が必要)、およびコストの上昇(通常$60~90/kg)が挙げられます。.
GF-PPは、負荷がかかり、かつ適度に高温の環境下でも形状を維持しなければならない構造用PP用途において、実用的な選択肢となります。収縮率が低いという特性だけでも、GF-PPは無充填PPに比べて成形時の許容範囲がはるかに広く、無充填材料の柔軟性や耐疲労性を特に必要としないユーザーにとっては、デフォルトのPPグレードとして検討すべきです。.
PPコポリマー
ランダム共重合体PP(PP-R)は、ポリプロピレン鎖に少量のエチレン共重合体を組み込んでおり、これにより結晶性が低下し、低温での耐衝撃性が向上します。PP-Rは、結晶性の低下により収縮が少なくなるため、ホモポリマーPPよりも若干印刷しやすくなりますが、その分、機械的特性は低下します。 ブロック共重合体PP(PP-B)は、エチレン・プロピレンゴムドメインを組み込むことで耐衝撃性を向上させており、自動車のバンパー用途で一般的に使用されています。これらの共重合体グレードはいずれも、専門サプライヤーから3Dプリント用フィラメントとして入手可能です。.
PP印刷における一般的な問題と解決策
反りおよびベッドへの密着不良
反りは、PP印刷における最大の問題です。その根本的な原因は、結晶化に伴う収縮にあります。印刷された部品が約120°C以下に冷却されると、ポリマー鎖が結晶領域を形成し、その体積は非晶質の溶融状態よりも小さくなります。この体積の減少により、部品内に引張応力が生じ、それがビルドプレートとの境界面に集中します。.
これらの対策は、互いに代替し合うものではなく、相乗効果を発揮するものです。確実な結果を得るためには、PP製の造形面、100~110°Cのベッド温度、35~50°Cのエンクロージャー温度、8~10mmのブリム、そしてパーツの角を丸めること(鋭い角は応力を集中させ、反りを引き起こす)をすべて組み合わせて使用してください。 これらの対策をすべて講じても反りが解消されない場合は、部品の形状自体に問題がある可能性があります。アスペクト比の高い大きな平面は、PPの反りにおいて最悪のケースとなります。その場合は、GF-PPに切り替えることが唯一の実用的な解決策となるでしょう。.
層間接着不良
層の境目で剥離が生じるPP部品は、層間のポリマー拡散が不十分であることが原因です。この問題を解決するには、ノズル温度を高く設定すること(ほとんどのPPグレードでは245~250°C)に加え、印刷速度を下げ、部品の冷却を最小限に抑える必要があります。 250°Cでも層間剥離が続く場合は、フィラメント内の水分(PP自体の吸湿性はごくわずかですが、添加剤や充填剤は吸湿性を持つ場合があります)が原因であるか、あるいは押出中に設定温度を維持できない出力不足のホットエンドが原因である可能性があります。.
糸引きと滲み
PPは、印刷温度での溶融粘度が低いため、ストリングが発生しやすい傾向があります。通常、リトラクション設定を25~35mm/sで4~6mmとし、移動速度を100~120mm/sに設定することで、ストリングを適切に抑制できます。 スライサーで「リトラクション時のワイプ」と「終了時のコースト」を有効にすると、さらに効果的です。ストリング現象が主に外観上の問題にとどまるPETGとは異なり、PPのストリングはかなり強固で除去が困難な場合があるため、大型や複雑なパーツをプリントする前にリトラクション設定を微調整しておく価値があります。.
PPとその他の柔軟性・耐薬品性材料との比較
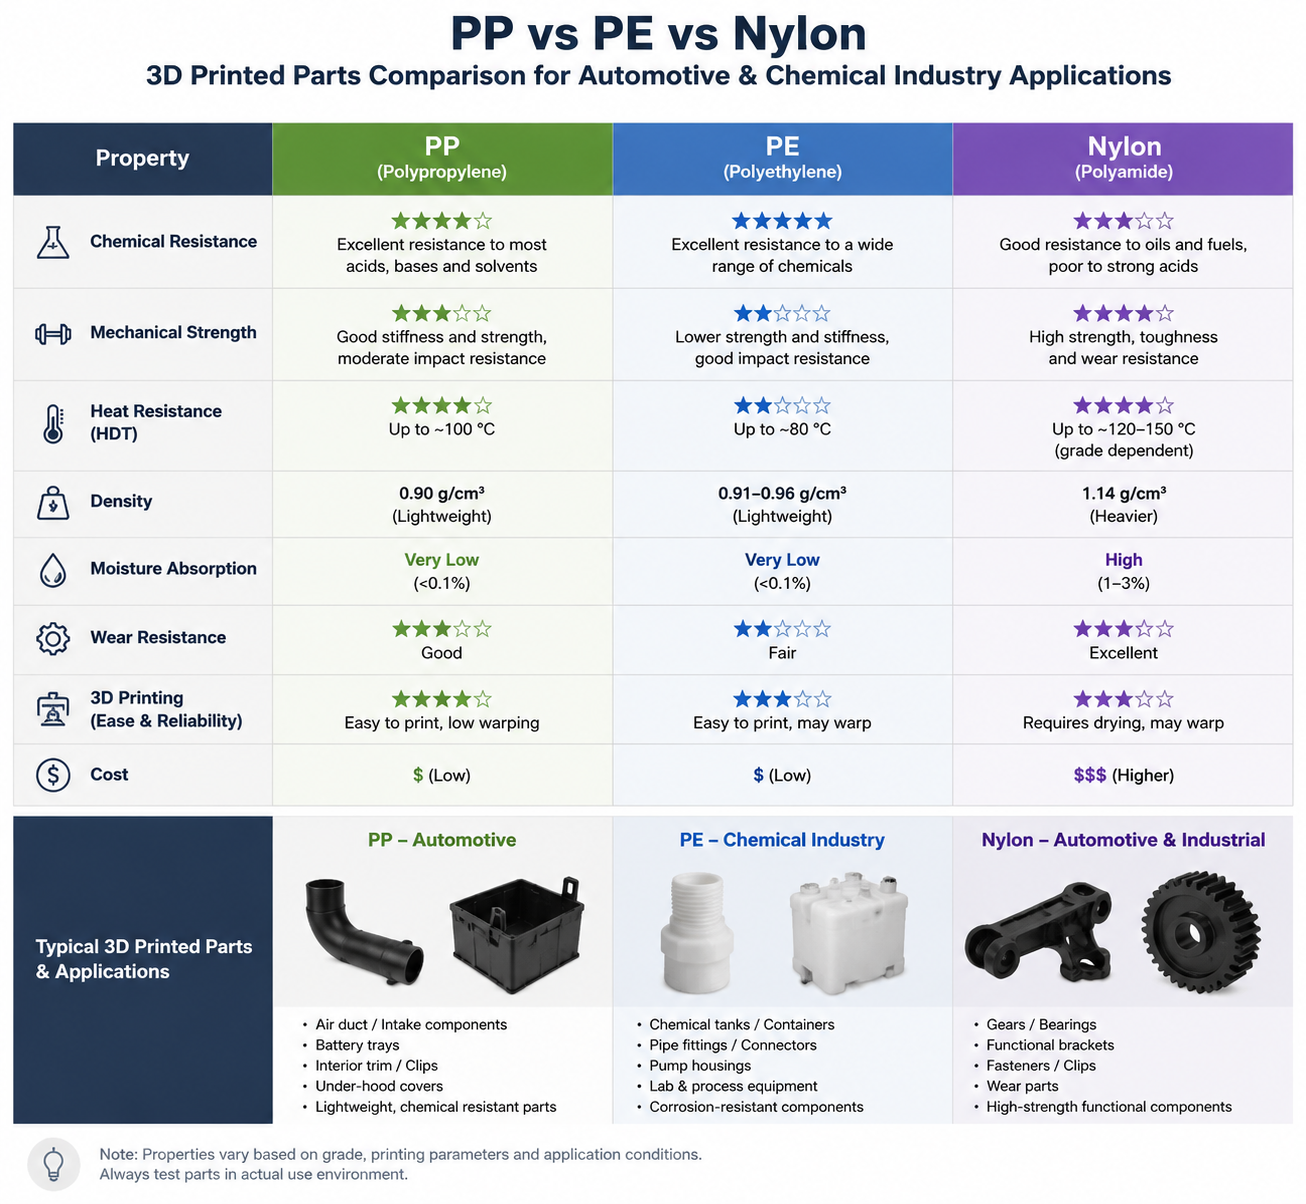
PPは、柔軟なフィラメント(TPU/TPE)やナイロンと、いくつかの特性を共有しているため、しばしばこれらと比較されます。PPがどこが異なるのかを理解することが重要です。.
TPUと比較して、PPは剛性が高く(曲げ弾性率:1.0~1.5 GPa 対 軟質TPUの0.01~0.1 GPa)、耐薬品性がはるかに優れており、単なる弾性ではなく真の耐疲労性を示します。 TPUは伸びて元に戻るのに対し、PPは曲げられ、繰り返し使用しても破損しにくい。数千回の作動に耐えなければならないリビングヒンジには、PPが適切な選択である。変形して弾性的に復元しなければならないガスケットやシールには、TPUが適切な選択である。.
ナイロン(PA6、PA12)と比較すると、PPは機械的強度(25~35 MPa 対 ナイロンの45~65 MPa)、耐熱性、および耐摩耗性において劣ります。 しかし、PPは耐薬品性、特にナイロンを侵食する酸や極性溶媒に対する耐性が優れており、また、PPは水分を吸収しません(ナイロンはグレードに応じて重量比で2~8%の水分を吸収し、これが印刷品質や機械的特性に劇的な影響を与えます)。 耐薬品性と疲労寿命が求められる、乾燥した室温での用途においては、PPの方が適した材料であることが多いです。高温下での構造用途においては、ナイロンの方が優れています。当社の ナイロン印刷ガイド PA6とPA12がリードし始めるあたりで、その差が開いてくる。.
PPはお客様の用途に適していますか?
PPの3Dプリントは、以下の要件のうち1つ以上を満たす用途に適しています。酸、アルカリ、または溶剤に対する耐薬品性;リビングヒンジや繰り返し曲げられる部品に必要な耐疲労性;可能な限り軽量な部品;あるいは、PP射出成形部品の実際の生産材料を用いたプロトタイプ製作などです。 一方、高い剛性、耐熱性、あるいは高い引張強度が求められる用途には不向きです。そのような場合は、フィラー入りナイロン、ポリカーボネート、あるいはPETGの方がより適切な材料となります。.
PPの習得に必要な初期投資はそれほど高くありません。PPフィラメント1ロール、PP対応のビルドプレート、そして温度や密着性の設定を最適化するためのテストプリントを数回行う程度です。 その見返りとして、化学的不活性、耐疲労性、低密度といった、他の一般的なFDMフィラメントでは得られない一連の材料特性を利用できるようになります。流体、可動機構、あるいは軽量構造を扱うエンジニアや製造業者にとって、PPは材料ツールボックスに必ず加えておくべき素材です。.
よくある質問
当社の ポリプロピレンとナイロンの比較 詳細な等級区分および物件データについては。.
なぜPPプリントがビルドプレートに密着しないのでしょうか?
最も考えられる原因は、標準の造形台を使用していることです。PPは表面エネルギーが極めて低く(29~31 mN/m)、PEI、ガラス、BuildTak、ブルーテープ、スティックのりなどには確実に密着しません。 解決策は、PP対応の造形面を使用することです。市販のPPプリントフィルム、ポリプロピレン製のシート、あるいは造形プレートに貼った透明なPP梱包テープのいずれかを使用してください。PPはPPに密着します。つまり、押し出された材料は、化学的に同一の表面と融合するのです。 これを100~110°Cのベッド温度と組み合わせることで、確実な第1層の密着が得られます。さらに、密着性を最大限に高めるために、8~10mmのブリムを設定し、第1層を通常のノズル温度より5~10°C高い温度でプリントしてください。.
標準的なEnder 3や類似のプリンターでPPを印刷することはできますか?
はい、ただし注意点があります。PPのノズル温度(220~250°C)とベッド温度(80~110°C)は、Ender 3を含むほとんどの標準プリンターの温度範囲内に収まっています。オールメタル製のホットエンドは必要ありません。 重要なアップグレードは2つあります。1つはPP対応の造形面(定期的に交換するPPシートまたはテープ)、もう1つは周囲温度を35~50°Cに保つためのエンクロージャー(可能であれば)です。エンクロージャーがない場合、大型のPPパーツは反りやすくなります。 小型の部品(いずれかの辺が50mm未満)であれば、適切なベッド表面とブリムを設定した開放型のプリンターでも印刷可能です。機能的なPP部品を確実に製造するには、チャンバー内を能動的に加熱できる密閉型プリンターが理想的ですが、必ずしも必要というわけではありません。.
3Dプリント用のPP(ポリプロピレン)用のリビングヒンジは、どのように設計すればよいでしょうか?
3DプリントされたPP製のリビングヒンジを成功させるには、以下の設計ルールに従う必要があります:(1) 層高0.2mmで単層プリントする場合、ヒンジの厚さは0.3~0.5mmとする; (2) ヒンジ軸はビルドプレートのY軸と平行でなければならない。これにより、曲げた際に層が剥がれるのではなく、層をまたいで曲がることでヒンジが開くようになる;(3) 応力集中を避けるため、厚い部分から薄いヒンジ部分への移行部には十分な半径(少なくとも1mm)を設ける; (4) ヒンジ部の層間強度を最大化するため、245~250°Cで印刷し、冷却は最小限に抑えること; (5) プリント直後、部品がまだ温かいうちに、ヒンジを可動範囲いっぱいに5~10回曲げて慣らしを行うこと。これにより、ヒンジ領域のポリマー鎖が「加工硬化」し、疲労寿命が劇的に向上する。.
PPフィラメントと、機械加工用のPPシートやロッドとの違いは何ですか?
3DプリントされたPPは異方性の機械的特性を持ちます。層間境界の影響により、Z方向(層を横切る方向)よりもX-Y面(層に平行な方向)の方が強度が高くなります。一方、押出成形されたシートやロッド材から機械加工されたPP部品は、押出成形中に材料が圧力下で緻密化されるため、機械的等方性を示します。 主荷重がプリント層と一致する用途では、3DプリントされたPPは、機械加工されたPPの強度の70~85%を達成できます。等方性の特性が求められる用途では、機械加工されたPP素材の方が優れていますが、コストが高く、リードタイムも長くなります。これは、積層造形と切削加工における根本的なトレードオフです。.